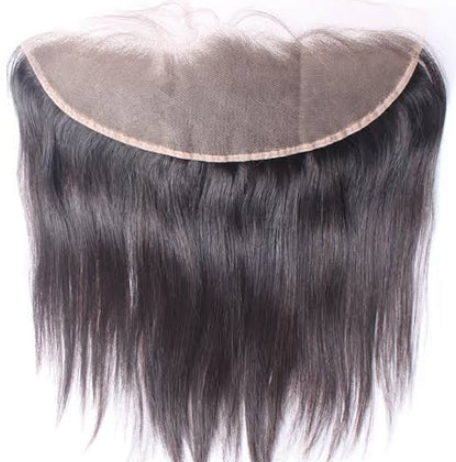
How to Install a Frontal Lace Wig on a Low Hairline?
Frontal lace wigs have gained immense popularity as a versatile and convenient solution for changing hairstyles. If you have a low hairline, you may face some challenges when it comes to installation. However, with the right techniques and tools, you can achieve a flawless and natural-looking result. In this article, we will provide you with a step-by-step guide on how to install a frontal lace wig on a low hairline.

How to Put a Lace Frontal Wig if I Have Low Hairline?
Step 1: Preparing Your Natural Hair
Before diving into the wig installation process, it's essential to prepare your natural hair properly. This step will ensure a smooth foundation for the wig and enhance the overall look.
1.1 Washing and Conditioning:
Begin by washing your natural hair with a gentle shampoo and conditioner to remove any dirt, oils, or product buildup. Clean hair will provide a better surface for the wig to adhere to.
1.2 Styling Your Natural Hair:
If your natural hair is long, consider braiding it or putting it into flat twists. This technique helps create a flatter surface, making the wig installation process more seamless.
Step 2: Preparing the Wig
To achieve a natural-looking low hairline, customizing the wig is crucial. Here's how you can prepare the wig before installation:
2.1 Washing the Wig:
Start by gently washing the wig using a mild shampoo and conditioner. This step removes any chemicals or residue present in the wig and ensures a fresh and clean base.
2.2 Drying the Wig:
Allow the wig to air dry or use a low heat setting with a blow dryer. Remember to avoid high heat, as it can damage the wig's lace front.
Step 3: Customizing the Wig
Creating a natural-looking low hairline requires customization of the wig to fit your unique features and preferences.
3.1 Placement and Fit:
Place the wig on your head without using any adhesive to determine the desired placement and fit. Use a wig cap to hold your natural hair in place during this process.
3.2 Trimming the Lace:
If necessary, trim the excess lace along the hairline using sharp scissors. Cut in small sections, following the natural shape of your hairline. Take caution not to cut too close to the hairline, as this can damage the wig.
Step 4: Preparing Your Skin
For a secure and long-lasting wig installation, preparing your skin is essential. These steps ensure a clean surface and promote a strong bond with the adhesive.
4.1 Cleansing Your Forehead and Hairline:
Thoroughly cleanse your forehead and hairline, removing any oils, dirt, or makeup. This step allows the adhesive to adhere better to your skin.
4.2 Applying Scalp Protector or Primer (Optional):
Consider applying a scalp protector or primer to create a barrier between your skin and the adhesive. This protective layer helps safeguard your skin and facilitates the removal process.
Step 5: Applying the Adhesive
Choosing the right adhesive and applying it correctly is crucial for a secure and natural-looking wig installation.
5.1 Selecting the Adhesive:
Choose an adhesive based on your preferences and needs. There are various options available, such as glue, tape, or adhesive sprays designed specifically for wig installation.
5.2 Applying the Adhesive:
Apply a thin layer of adhesive along your hairline, ensuring it is evenly distributed. Be cautious not to apply an excessive amount, as it may create a visible buildup or affect the overall appearance.
Step 6: Positioning the Wig
6.1 Placing the Wig:
Carefully place the wig on your head, starting from the front and working your way back. Align the front of the wig with your natural hairline, ensuring it sits securely and comfortably.
6.2 Attaching the Frontal:
Gently press the lace front of the wig onto the adhesive, starting from the center and moving outwards. Use a clean, soft brush or your fingertips to secure the wig firmly. Be gentle to avoid damaging the lace or causing any discomfort.
6.3 Adjusting the Fit:
Check the fit of the wig and make any necessary adjustments. Most frontal lace wigs come with adjustable straps at the back, allowing you to achieve a snug and secure fit. Tighten or loosen the straps to ensure the wig feels comfortable and stays in place.
6.4 Securing with Clips:
Some wigs also have built-in clips or combs along the sides and back. If your wig has these features, carefully insert the combs into your natural hair to provide additional security. Ensure the clips are securely attached without causing any discomfort or tension on your scalp.
Step 7: Final Touches
To create a seamless blend between the wig and your natural hairline, and achieve a flawless look, there are a few final touches to consider.
7.1 Styling the Wig:
Once the wig is securely in place, you can style it to your liking. Use heat styling tools on a low or medium setting to curl, straighten, or add waves to the hair. Take care not to apply excessive heat, as it can damage the wig's fibers.
7.2 Blending with Baby Hairs:
To enhance the natural appearance of the wig, gently pull out a few baby hairs along the front hairline. Using a small brush or comb, coax some strands of hair from the wig and blend them with your natural hairline. This step helps create a seamless transition between the wig and your skin.
7.3 Concealing the Lace:
To make the lace front of the wig appear more natural, apply a small amount of concealer or foundation that matches your skin tone to the lace. Use a small brush or your fingertips to gently dab the product onto the lace, ensuring it blends seamlessly with your skin.
7.4 Final Adjustments:
Take a moment to check the overall look and fit of the wig. Make any necessary tweaks to the positioning, tightening straps, or securing clips to ensure maximum comfort and a flawless appearance.

